Add Selections to a Category
Easily group & manage construction selection sheets using ConstructionOnline’s Client Selections
BACKGROUND
Through a user-friendly web interface, ConstructionOnline™ offers intuitive tools for delivering simple, comprehensive new home selections to streamline project management and personalize any given construction job. Nestled within Categories, Selections give ConstructionOnline™ Users more flexibility when it comes to managing various Choices for the clients. With this multi-leveled approach to selection sheet organization and management, companies can stay on track while providing clients with the ultimate power of choice.
PREREQUISITES
- A Client Selections Category must be created for Selections to be added.
- “Category” is the broadest level of organization available for Client Selections. Beyond Categories, Client Selections are further segmented by “Selections” wherein individual “Choices” are populated.
- Categories can have an unlimited number of Selections, and each Selection can have an unlimited number of Choices.
- Only one Choice per Selection can be marked as “Approved.”
- “Category” is the broadest level of organization available for Client Selections. Beyond Categories, Client Selections are further segmented by “Selections” wherein individual “Choices” are populated.
STEPS TO ADD SELECTIONS TO A CATEGORY
- Navigate to the desired Project via the Left Sidebar.
- Click the Financials tab and choose the Client Selections category.
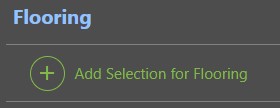
- Scroll to the Selection Category you wish to add a Selection to and click the green (+) Add Selection button.

- Within the New Selection window, enter the Selection Name (this step is required), then fill in any additional information as desired:
- Location: The room, building, or other identifying location relevant to the fixtures and finishes at hand (i.e. Kitchen, Master Bathroom, 10th Floor, Building 6, etc.)
- Due Date: The date by which the approval of a Choice is due
- Allowance: The dollar amount allocated for this Selection
- Milestone: A date within the Project Schedule to which the Selection can be linked for advanced, connected project management
- Cost Codes: Choose the desired Cost Code for the Selection from the dropdown menu
- Cost Codes must be assigned to the Project to populate here.
- Trade: Select a Trade to attach to the Selection
- This field can be customized.
- Selection Notes: Any additional Notes about the Selection
- Selection Choice Visibility: Company Users will find that they are able to choose between two visibility settings within the Selection Detail modal to designate which Selections and subsequent Choices are visible for ClientLink™ Contacts in the ClientLink™ Portal:
- This Selection and its Choices will be visible to clients in the ClientLink™ Portal if they have permission to view Selections.
- This Selection and its Choices will not be visible to clients in the ClientLink™ portal, regardless of their permission settings.
- To finalize the Selection, click the blue “Create” button to Create the New Selection. The Selection will populate under its respective Category.
Once a Selection has been added to a Category, you can begin to Add Selection Choices for your clients:
- Each Selection can have an unlimited number of Selection Choices.
- Only one Selection Choice per Selection can be marked as “Approved.”
ADDITIONAL INFORMATION
- Client Selection Categories, Selections, and Choices can be created manually per Project, included as part of a Project Template, or imported from Excel.
- Permissions: Only ConstructionOnline™ Company Users with “Can Create, Edit, & Delete” permissions can add selections to a category.
- ClientLink™ and TeamLink™ Users cannot create Categories or Selections, however depending upon the ConstructionOnline™ Company's ClientLink™ / TeamLink™ Settings, they may have permission to view, approve, and/or create Selection Choices.
- Mobile App: New Categories, Selections, and Choices can be created within the ConstructionOnline™ Mobile App.
HAVE MORE QUESTIONS?
- Frequently asked questions (FAQ) about Client Selections can be found in the article FAQ: Client Selections.
- If you need additional assistance, chat with a Specialist by clicking the orange Chat icon located in the bottom left corner or visit the UDA support page for additional options.