Enter a Location for a Selection
Keep selection sheets organized by adding a specific location for each Selection in ConstructionOnline™.
BACKGROUND
As the industry-leading online platform for construction management software, ConstructionOnline™ provides easy-to-use online tools for creating & managing selection sheets with Client Selections. Using Client Selections, ConstructionOnline™ Company Users can easily share selection sheets with clients, document client approvals, and track key metrics like due dates, overages, and more. Company Users can also add a location for each individual Selection—making it much easier for clients to keep track of all fixtures & finishes within the job.
STEPS TO ENTER A LOCATION FOR A SELECTION
- Navigate to the desired Project via the Left Sidebar.
- Select the Financials tab, then choose the Client Selections category.
- Scroll down to the Selections Details pane and locate the desired Selection.
- Right-click the desired Selection and select the Edit Selection option.
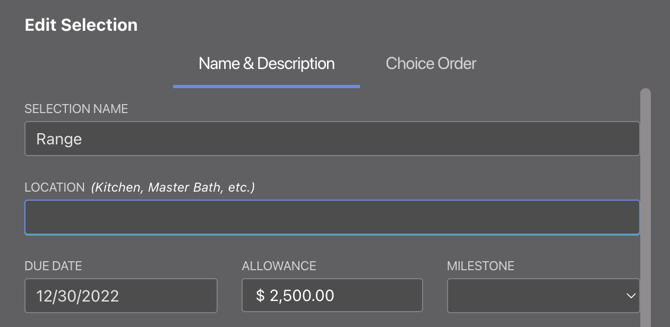
- Enter the chosen location in the corresponding Location text box.

- Click the blue Save Changes button to finalize the new location.
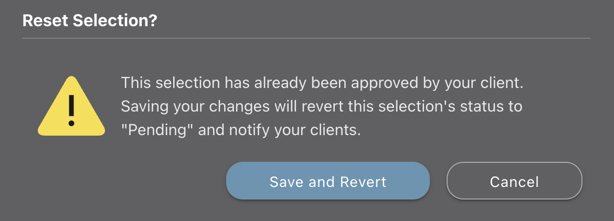
- If the Selection has already been approved, a pop-up message will appear asking you to confirm that you would like to revert the Selection to "Pending" and notify your clients.

- Click the blue Save and Revert button to verify your decision and save the new location for the Selection.
- If the Selection has already been approved, a pop-up message will appear asking you to confirm that you would like to revert the Selection to "Pending" and notify your clients.
ALTERNATIVE ACCESS POINT
- If the Selection is set to "Pending", the Pending Selections pane can be also used to access the Edit Selection option. Right-click one of the Selections to open the Edit Selection window.
ADDITIONAL INFORMATION
- A location can only be entered at the Selection level––not the Category or Selection Choice levels. More information about the different Client Selections levels can be found in Overview: What are Client Selections?
- Company Users can generate a professional, print-ready report that organizes Selections by location with the Selections by Location Report.
- Permissions: Company Users must have permissions for Client Selections set as "Can Create, Edit, & Delete" to enter a location for a Selection.
- ClientLink/TeamLink Access: ClientLink™ and TeamLink™ Users with Client Selections permissions set as "Can View Selections..." can view locations for Selections but cannot enter locations for Selections.
- Mobile App: Company Users can enter a location for a Selection using the ConstructionOnline Mobile App.
HAVE MORE QUESTIONS?
- Frequently asked questions (FAQ) about Client Selections can be found in the article FAQ: Client Selections.
- If you need additional assistance, chat with a Specialist by clicking the orange Chat icon located in the bottom left corner or visit the UDA support page for additional options.