BACKGROUND
ConstructionOnline's award-winning construction CRM software is designed to help successful construction companies organize contacts of all types—streamlining project management and creating open channels of communication. ConstructionOnline provides six different contact designations, each designed for a unique purpose and function within the platform: Company Contacts, ClientLink Contacts, TeamLink Contacts, Leads, Basic Contacts, and Inactive Contacts.
THINGS TO CONSIDER
- Check out the "Essential Guide to Contacts in ConstructionOnline™" for more information regarding each type of Contact.
- This article covers how to add TeamLink, ClientLink, and Basic Contacts.
- For the creation of the other types of ConstructionOnline Contacts, check out:
- All Contact(s) in ConstructionOnline must have a First, Last, and Display Name as well as a unique Email Address.
- To create new Contacts in bulk, Import Contacts into ConstructionOnline.
- Imported Contacts enter ConstructionOnline as Basic Contacts.
- Within ConstructionOnline, any field that shows the
 icon is a Custom Value, allowing users to add, edit, or remove categories. These fields can be customized by clicking on the icon.
HOW TO ADD A NEW TEAMLINK™, CLIENTLINK™, OR BASIC CONTACT
- Access the "Team Management" tab through the Left Sidebar or the Company Selector in the Top Navigation Bar.
- Select "Contacts" under the "Contacts & Companies" section.
- Click the green (+) Add New Contact button.
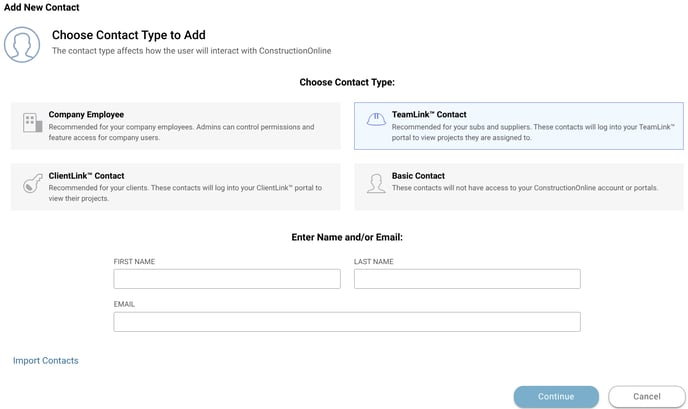
- This will open the "Add New Contact" window.
- This will open the "Add New Contact" window.
- Select which Contact Type you would like to add -
- ClientLink™ Contacts: generally construction clients, developers, investors, architects, or any other third-party contacts who have been involved in contracting the construction work for completion.
- TeamLink™ Contacts: generally subcontractors, vendors, suppliers, or other contacts who have a responsibility or relationship to one or more of your company's projects.
- Basic Contacts: Individuals whose information you wish to keep within your ConstructionOnline Company Contacts List for communication purposes but who do not require access to your ConstructionOnline Company Account or the Portals.
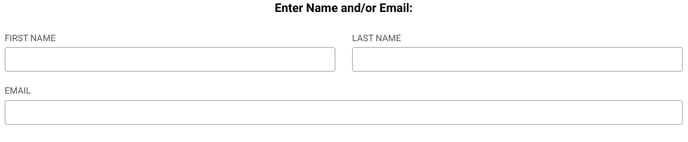
- Enter the new Contact's First Name, Last Name, and unique Email Address. These are required fields.
- Click the blue "Continue" button.
- ConstructionOnline will automatically scan its database of 1 million users to see if the Contact has an existing account.
- If an account is found, confirm the Contact and press the blue "Add Contact" button to generate the Contact.
- If no account is found, click the blue "Click here to enter the contact details manually."
- ConstructionOnline will automatically scan its database of 1 million users to see if the Contact has an existing account.
- Following your decision, the "Add New Contact" window will open. This is where you can enter more of the Contact's details, including -
- First Name: The Contact’s first name.
- MI: Their middle initial.
- Last Name: Their last name.
- Display Name: The name as it should appear in your Company Contact List.
- ConstructionOnline, by default, will populate the First & Last Name entered. However, this can be changed if you would like to use a different preferred name for the Lead.
- Company: The name of the Company the Contact works for.
- Email: Their email address.
Note: Every user must have a unique email address. If you try to use an email address that is already associated with an existing Contact in the system, you'll get a message from the system alerting you that the email address is already in use. - Contact Group: Categorize the Contact by assigning them to a group for organizational purposes.
- Trade: The Contact’s trade or profession.
- Contact Category: Classify the Contact for further organization.
- Office: If the Contact is associated with an office location, enter it here.
- Division: If the Contact is a part of a specific division within the Company, enter it here.
- Region: The geographic region where the Contact is located.
- Job Title: The Contact’s professional title.
- Quality: The internal quality rating score for the Contact.
- Phone: The Contact’s phone number.
- Mobile: The Contact’s mobile phone number.
- Mobile Provider: The Contact’s mobile phone carrier.
- Fax: Their fax number.
- Website: The Contact’s website or company website.
- Address: The Contact’s street address.
- City: The city.
- State: The state.
- Zip / PC: The zip code/postal code associated with the Contact’s address.
- Country: The country.
- Hit the blue "Add Contact" button.
- If you are creating a TeamLink or ClientLink Contact, the "Add Contact to Projects" window will open.
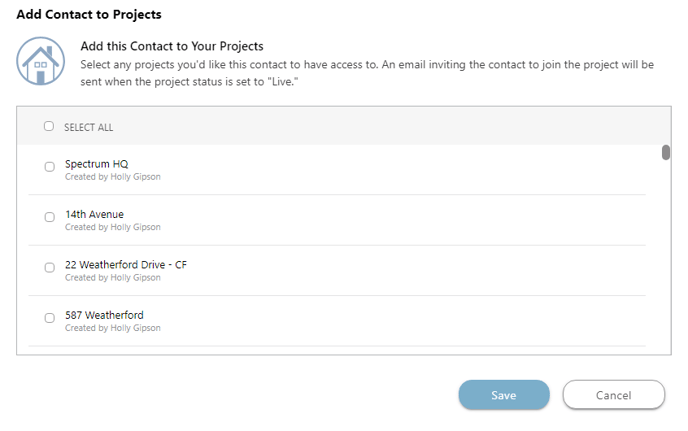
- Select any Projects you would like the Contact to have access to.
- You can check the "Select All" box to give the Contact access to all Projects within your ConstructionOnline account.
- You do not have to mark any of the boxes if you wish to keep the Contact from accessing any Projects. Contacts can always be added to a Project at a later time.
Note: If any of the Project boxes are checked, the Contact will receive an email invitation to join the chosen Project(s). Emails will only be sent for Projects when the Project's Status is set to “Live.”
- Press the blue "Save" button.
- Select any Projects you would like the Contact to have access to.
- If you are creating a TeamLink or ClientLink Contact, the "Add Contact to Projects" window will open.
- Within the "Contact Details" window, review and add the following information for the Contact -

- Public Details: Contact information set by the Contact that is visible to other users within ConstructionOnline. Upon activating their account, only the Contact themselves can edit the information that appears here.
- Private Details: Contact information that is only visible to your Company Account (Company Employees).
👉 Click here for more information about the difference between Public and Private Contact Details. - Projects: Lists all Company Projects where the Contact is included as part of the Project Team.
- Within this tab, you can resend Project Invitation emails, view the Contact's last login date, manage global Portal permissions, and/or remove them from Projects.
- GamePlan: Create and manage the Contact's ConstructionOnline GamePlan.
- Delete: Delete the Contact from any assigned Projects and from your Company Contact List.
Note: Deleted Contacts cannot be recovered. Deleting the Contact does not delete the Contact's ConstructionOnline account. - Attachments: Upload, view, and manage Files and/or Photos specifically related to the Contact.
- Business cards, licenses, certifications, work authorizations, and more can be stored here if desired.
- Click the blue “Save” button to create the new Contact.
TIPS AND TRICKS
- Learn how to add a ClientLink/TeamLink Contact to a Project: Add ClientLink/TeamLink Users to a Project
- Learn how to manage your company's global ClientLink/TeamLink Permissions: Manage ClientLink/TeamLink Permissions
ADDITIONAL INFORMATION
- Badges will appear beside each Contact to denote whether they are a Company Employee, Company Admin User, ClientLink User, TeamLink User, Basic Contact, or Lead.
- Alternative Access Point: Contacts can also be added from the "Team" tab within the Project you wish to assign them to.
- Subscription Level: The Company Directory is available for all ConstructionOnline subscriptions.
- Permissions: Admin Users and Company Users can create ConstructionOnline Contacts.
- CO™ Mobile App: Users can create and edit Contact(s) via the app.
- However, Contact(s) can only be deleted via browser access to ConstructionOnline.
HAVE MORE QUESTIONS?
- Frequently asked questions (FAQ) regarding Contacts can be found in the FAQ: Contacts article.
- If you need additional assistance, chat with a ConstructionOnline Specialist by clicking the orange Chat icon located in the bottom left corner or visit the UDA support page for additional options.