Print a Punch List
Generate a print-ready copy of a construction punch list, which can be customized with specific filters, company-wide headers & footers, and more
BACKGROUND
With industry-leading tools for construction project management, ConstructionOnline™ helps construction pros create, manage, & share detailed construction punch lists.
ConstructionOnline's cloud-based punch lists can contain an unlimited number of tasks & sub-tasks and can be easily shared or assigned to subcontractors, suppliers, or any other project team members.
In addition to sharing construction punch lists directly within ConstructionOnline, ConstructionOnline Company Users can also generate a print-ready version of a construction punch list—making it easy to share punch lists with any users who do not have a ConstructionOnline account or in any instances when paper copies of the punch list are preferred.
This article contains the following sections:
STEPS TO PRINT A PUNCH LIST
- Navigate to the desired Project via the Left Sidebar.
- Select the Project Tracking tab, then choose the Punch Lists category.
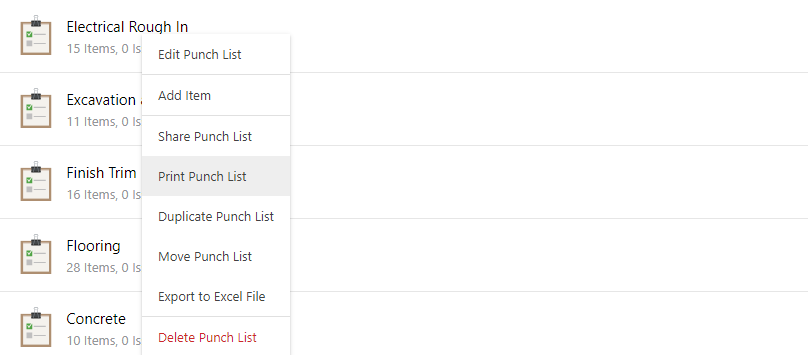
- Right-click on the specific Punch List and select the Print Punch List option.

- If the Punch List is stored within a Folder, drill down to the specific Punch List by clicking on & opening the relevant Folder(s).
- Within the Print Punch List window, choose from the following details to customize the printed Punch List.
- Within the Print Punch List tab:
- Select Project: choose the Project that contains the Punch List. The current Project is selected by default.
- Select Punch List: choose the specific Punch List you would like to print. The pre-selected Punch List is selected by default.
- Filter Punch List by
- Resource: choose to filter the Punch List by a specific resource. Punch Lists can only be filtered by one resource at a time.
- Item Priority: choose to filter the Punch List by priority. Options include Show All, None, Low, Medium, and High. Show All is selected by default.
- Item Status: choose to filter the Punch List by status. Options include Show All, None, In Dispute, Work Completed, Closed, Ready, and Open. Show All is selected by default.
- Choose what items to include from the Punch List: using the dropdown menu, select which category of Item completion should be included on the Punch List. Options include:
- Incomplete Items and Incomplete Issues
- Incomplete Items and All Issues
- Completed Items
- Completed and Incomplete Issues - this option is selected by default
- Additional Options
- Choose from other customization options by selecting or deselecting the ☑️ check mark beside the corresponding option. Options include:
☑️ Include digital signatures: displays any signatures already added to the Punch List.
☑️ Include blank signature lines: adds two blank signature lines to the bottom of the Punch List.
- Choose from other customization options by selecting or deselecting the ☑️ check mark beside the corresponding option. Options include:
- Within the Default Text tab
- Choose to insert any Default Text Block into the Punch List. Select from Default Text Blocks already saved to the Company Account, or create new Default Text Blocks directly from within the Print Punch List modal.
- Upper Default Text: Text will appear above the main document content.
- Lower Default Text: Text will appear below the main document content.
- Choose to insert any Default Text Block into the Punch List. Select from Default Text Blocks already saved to the Company Account, or create new Default Text Blocks directly from within the Print Punch List modal.
- Within the Header & Footer tab:
- Default Header & Footer Settings will apply for companies with Pro or Team Plans.
- Companies with Business or Enterprise Plans can choose to apply custom Header & Footer sets to the document.
- Headers & Footers are managed at the Company level.
- To manage Header & Footer sets, click on the Manage Header & Footer Sets hyperlinked text.
- Within the Print Punch List tab:
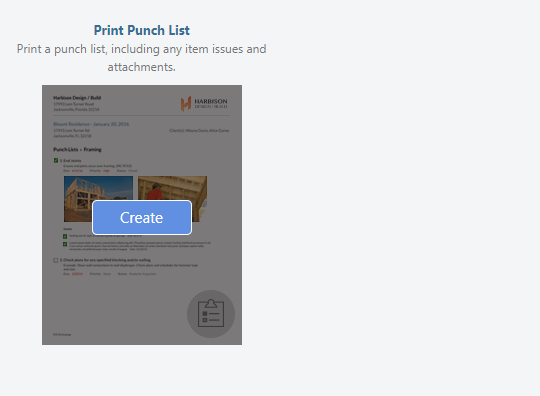
- Finalize the details of the Punch List by clicking the blue Create button.
- The Punch List will open in a new browser tab for you to Share (via email), Save (to ConstructionOnline Files), Download (as PDF), Edit (in built-in text editor), or Print.
VIDEO WALKTHROUGH
ADDITIONAL INFORMATION
- Permissions: Company Users must have permissions for Punch Lists as "Can Create, Edit, & Delete" or "Can View" to print a Punch List.
- ClientLink/TeamLink Access: ClientLink™ and TeamLink™ Users with Punch List permissions enabled can print out Punch Lists if they have been added as Punch List Viewers/Editors or as Assigned Resources to specific Punch List Items.
- If a user has not been assigned as a Punch List Editor or Viewer, they will only be able to print out the Punch List Items they have been assigned to.
- Mobile App: Punch Lists cannot be printed out from the CO™ Mobile App. The creation of reports & documents is exclusively available via browser access to ConstructionOnline.
ALTERNATIVE ACCESS POINTS
- You can also print directly within a Punch List by selecting the Print Punch List button located next to the Hide Completed Items checkbox.
- Please note this option is only visible if you have drilled down into the specific Punch List you would like to print out.

- Please note this option is only visible if you have drilled down into the specific Punch List you would like to print out.
- Additionally, you can print a Punch List from the Project Tracking Reports category.
- Navigate to the desired Project via the Left Sidebar.
- Select the Project Tracking tab, then choose the Project Tracking Reports category.
- Scroll down to the Punch List section, then select Print Punch List.

- Follow steps 4 - 5 as listed above.
HAVE MORE QUESTIONS?
- Frequently asked questions (FAQ) regarding Punch Lists can be found in the FAQ: Punch Lists article.
- If you need additional assistance, chat with a Specialist by clicking the orange Chat icon located in the bottom left corner or visit the UDA support page for additional options.