BACKGROUND
Engineered to streamline the communication between you and your builder, ConstructionOnline's ClientLink™ Portal provides the unique ability for you to stay up to date on your project's progress from any time, at any place. Part of the customization options available for the ClientLink™ Portal is the ability to allow clients to view, approve, and create Selection Choices all from one cloud-based location. With appropriate Client Selections permissions, you can add your preferred Selection Choices from the ClientLink™ Portal to be confirmed and/or approved by a ConstructionOnline™ Company Admin.
PREREQUISITES
- ClientLink™ Users must have Client Selections permissions set to "Can create Client Selections" to add Selection Choices from the ClientLink™ Portal.
STEPS TO ADD A SELECTION CHOICE TO A CLIENT SELECTIONS CATEGORY FROM THE CLIENTLINK™ PORTAL
- Within the desired Project, select the Financials tab and choose the Client Selections category.
- Scroll down to the Selections Details pane and find the desired Selection you wish to add a Selection Choice to.
- Click the green (+) Add Selection Choice button.

- Within the New Selection window, choose whether you would like to Enter Selection details manually or Install the Selection QuickPick Add-On.
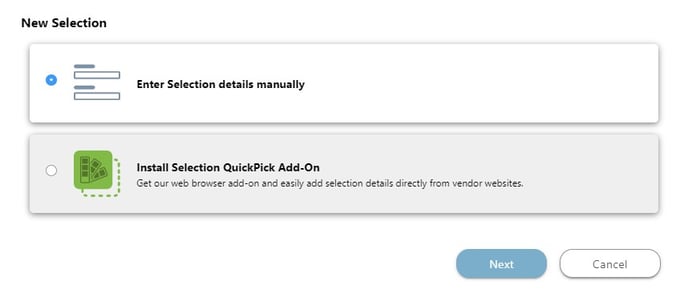
- If selecting to Enter Selection details manually, a New Selection Choice window will open. Step through the New Selection Choice window to populate choice information, including:
- Details:
- Choice Name: *Required
- Vendor(s) - From Your Contact List: This field is not available within the ClientLink™ Portal.
- Vendor(s) - External: Vendors relevant to the Selection Choice can be entered here (e.g. Home Depot, Lowe's, etc.).
- Item Webpage: Enter the URL where the choice/item(s) can be accessed, if applicable.
- Description: Enter a description of the choice/item(s) or any other relevant details here.
- Cost & Quantity: Enter the Unit Cost and Quantity to generate the Total Cost for this Selection Choice.
- Attachments: Add any additional attachments relevant to the Selection Choice, such as item images, product instructions, spec sheets, brochures, etc.
- Item Image: Upload the Item Image that will appear as the Choice's cover image on the Selection Choice card.
- Details:
- Once the Selection Choice Details are complete, click the blue "Create" button to create the New Selection Choice.
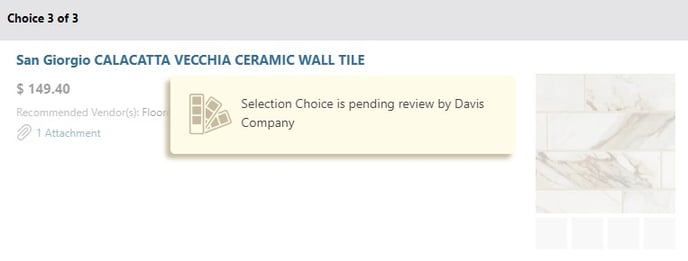
- The new Selection Choice will populate within its respective Selection with a "Selection Choice is pending review by [COMPANY]" message.
- Selection Choices added from the ClientLink™ Portal must be reviewed by a Company Admin before they can be marked as "Approved" by you or your builder.
Want to streamline uploading product details to New Selection Choices? Learn how to Install the Selection QuickPick Add-On here.
ADDITIONAL INFORMATION
-
Permissions: ClientLink™ Users with Client Selections permissions set to "Can create Client Selections" can add Selection Choices from the ClientLink™ Portal.
-
TeamLink™ Users cannot add Selection Choices from the Portal, but with appropriate Client Selections permissions may be able to view Client Selections.
-
-
Mobile App: ClientLink™ Users can add Selection Choices from the ConstructionOnline™ Mobile App.
HAVE MORE QUESTIONS?
- Frequently asked questions (FAQ) by ClientLink Users can be found in the article FAQ: ClientLink.
- If you need additional assistance, chat with a Specialist by clicking the orange Chat icon located in the bottom left corner or visit the UDA support page for more options.