BACKGROUND
As the leading provider of construction management software, ConstructionOnline™ provides construction pros with powerful tools to build and manage construction punch lists. In addition to creating new construction punch lists from scratch, ConstructionOnline Company Users can also import punch lists from Excel by using one of ConstructionOnline's custom Excel templates. Importing punch lists from Excel gives construction pros more flexibility when creating and organizing punch lists for safety inspections, final walkthroughs, and other pending work items that need to be addressed before project completion.
This article contains the following sections:
PREREQUISITES
- Punch Lists must be imported using one of ConstructionOnline's Excel templates to ensure Punch Lists are properly formatted for successful import.
- Each Punch List Item or Item Issue number must be a whole integer. For example, 1 or 2 are acceptable; not 1.1. or 2.1.
- The template column structure should not be edited. All columns and column headers must remain as presented in the template file for import.
STEPS TO IMPORT A PUNCH LIST FROM EXCEL
- Navigate to the desired Project via the Left Sidebar.
- Select the Project Tracking tab, then choose the Punch Lists category.
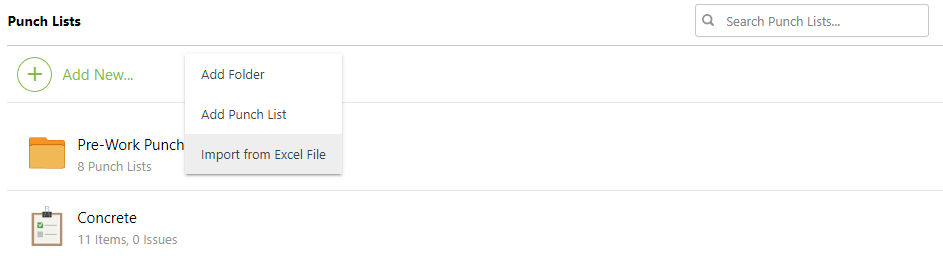
- From the Punch Lists pane, click the green (+) Add New... button and select the Import from Excel File option.
- Under Download Punch List Excel Templates, click on the blue hyperlinked text of your desired Punch List Template type to download a copy of the template to your device.
- After opening the downloaded template, enter your Punch List information into the template.
- Once data has been entered into the Excel spreadsheet, review to confirm that it follows the required import format and no column headers have been removed or edited.
- If using the template with Item Issues, make sure each Item and Item Issue is populated to an individual row within the corresponding column for data to import successfully.
- After confirming the Punch List is formatted properly for import, save the Excel file as a .XLXS or .CSV file.
- Navigate back to the Punch List window and click the Choose File button.

- Using your device's file manager, locate and upload the saved template file.
- Enter the desired name for your Punch List in the Punch List Name field.

- The name field will automatically generate with the name of the saved Excel file.
- Click the blue Import button to initialize the import of the Punch List.
- The system will confirm a successful import by displaying a message stating "Your Punch List was successfully imported"
- Any changes to the template column structure will result in a formatting error message. Affected Punch List Items will be skipped during the import and will not appear within ConstructionOnline.
VIDEO WALKTHROUGH
ADDITIONAL INFORMATION
- Permissions: Company Users must have permissions for Punch Lists set as "Can Create, Edit, & Delete" to import a Punch List into ConstructionOnline.
- ClientLink/TeamLink Access: ClientLink™ and TeamLink™ Users cannot import Punch Lists from Excel; however, depending upon the ConstructionOnline Company's ClientLink/TeamLink Settings, they may have permission to view or edit Punch List Items.
- Mobile App: Importing Punch Lists from Excel is exclusively available via browser access to ConstructionOnline.
HAVE MORE QUESTIONS?
- Frequently asked questions (FAQ) regarding Punch Lists can be found in the FAQ: Punch Lists article.
- If you need additional assistance, chat with a Specialist by clicking the orange Chat icon located in the bottom left corner or visit the UDA support page for additional options.