BACKGROUND
To safeguard both the contractor and the owner involved in a construction project, it is important to have a robust system in place for addressing potential issues. Beyond simply documenting areas of the work that need attention, ConstructionOnline’s Warranty Issues are detailed records that can serve as a powerful tool for project management and risk mitigation. By using the Warranty Issues tool within the Warranty Tracking feature, contractors can effectively communicate the issue to all relevant parties, coordinate service appointments, expedite the resolution process, and minimize potential disputes.
THINGS TO CONSIDER
Within ConstructionOnline, any field that shows the gear icon![]() is a Custom Value, allowing users to add, edit, or remove categories. These fields can be customized by clicking on the icon.
is a Custom Value, allowing users to add, edit, or remove categories. These fields can be customized by clicking on the icon.
HOW TO CREATE A NEW WARRANTY ISSUE
- Navigate to the Warranty Tracking feature from within the desired Project.
- If you have chosen to have Warranty Tracking appear as a Project Quick Link, you may also access the Warranty Tracking feature from the Project's "Overview" tab.
- If you have not yet completed the Project’s initial Warranty Tracking setup sequence, you will be prompted to do so by clicking on the green “Create a New Warranty” button.
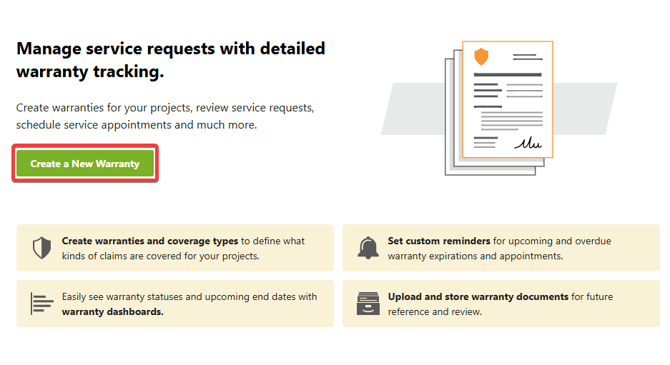
- You must walk through the Project's initial Warranty Tracking setup sequence before gaining access to ConstructionOnline's Warranty Issues feature.
- From within the "Warranty Issues" tab, press the green (+) Add a New Issue... button to open the "Create Warranty Issue" extension blade on the right-hand side of your screen.

This is where you can enter information about the Warranty Issue -
- Warranty Details
- Number: Assign the Warranty issue a number for organizational purposes.
- Related Project: The current Project is assigned by default and cannot be changed.
- Issue/Task: Briefly describe the reason for the coverage inquiry. This field is required.
- Location: Include the location where attention is needed.
- By default, ConstructionOnline populates several common living areas as location options.
- Trade: Select a trade related to the Warranty Issue.
- By default, ConstructionOnline populates the options of "None," "Electrical," "Plumbing," and "HVAC."
- Notes: Add any additional notes to elaborate on the issue/task.
- Requested By: Assign Contact(s) to reflect the person(s) who initiated the coverage inquiry.
- Requested: Record the date the Warranty Issue was requested.
- Defaults to the date created if not otherwise modified.
- Priority: Define the urgency of the Warranty Issue as "None," "Low," "Medium," or "High."
- Tags: Assign any predefined keywords or labels.
- By using Tags in ConstructionOnline, you can easily sort and track information within the system.
- Warranty & Coverage Type
- Issue Under Warranty?: Identify whether or not the Warranty Issue relates to an existing Warranty by selecting "Yes," "No," or "N/a."
- "N/a" is the default selection. This will only give you the ability to add a status. If you wish to include more details under this section, you must select "Yes."
- "N/a" is the default selection. This will only give you the ability to add a status. If you wish to include more details under this section, you must select "Yes."
- Related Warranty: If you have an existing Warranty that the Warranty Issue is related to, select it from the dropdown menu.
- However, Warranty Issues do not have to be associated with an existing Warranty. This field is required if you have selected "Yes."
- Coverage Type: Choose which coverage type the issue falls under from those included in the related Warranty.
- If you have not selected a related Warranty, no coverage type(s) will populate.
- Service Manager: Assign a Service Manager to the Warranty Issue.
- Warranty Issues are converted into service requests. Service Managers review these requests and can schedule service appointments as needed.
- Only Company Users designated as Warranty Service Managers in Warranty Settings will appear as options in the dropdown menu.
- Status: Identify the status of the Warranty Issue.
- By default, ConstructionOnline populates "None," "Requested," "Under Review," "Scheduled," "In Progress," and "Completed" as options.
- Issue Under Warranty?: Identify whether or not the Warranty Issue relates to an existing Warranty by selecting "Yes," "No," or "N/a."
- Warranty Details
- Along with these details, you can select the "Attachments" tab and press the green (+) Add New Attachment to upload any files, photos, or videos pertinent to the Warranty Issue.
- Once you have added all of the information you wish to include, hit the blue "Create" button to generate the issue.
- ClientLink Users with permissions set to have access to the Warranty Tracking feature can view all details included in a Warranty Issue.
- ClientLink Users with permissions set to have access to the Warranty Tracking feature can view all details included in a Warranty Issue.
ALTERNATIVE ACCESS POINT
- Navigate to the Warranty Tracking feature from within the Company Overview.
- From within the "Warranty Issues" tab, press the green (+) Add a New Issue... button.
- Choose which Project to create the Warranty Issue under and hit the blue "Next" button.
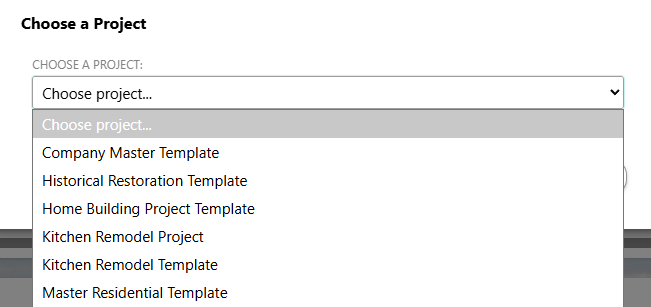
- To create a Warranty Issue, it must be assigned to a specific Project.
- Both “Live” and “Pending” Projects will appear in the dropdown menu for Admin Users.
- Company Users with the appropriate Warranty Tracking permissions will only see the Projects that they are team members on and that are set to “Live.”
- If you wish to create a Warranty Issue for a Project that has not had the initial Warranty Tracking setup sequence completed, you will be prompted to do so.
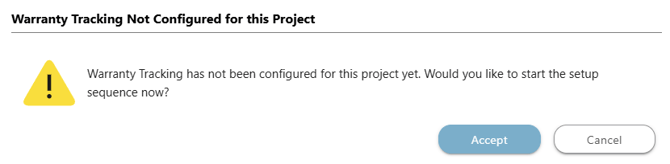
- To create a Warranty Issue, it must be assigned to a specific Project.
- Follow Steps 4-6 from the section above.
NEXT ACTIONS
Activated upon the creation of a Warranty Issue, ConstructionOnline’s “Warranty Issues” Timeline provides a visual and actionable guide for the next steps you and your team should take in the Warranty Tracking process. While the feature was designed with flexibility in mind, the timeline can help in staying organized by highlighting the crucial stages that follow after a Warranty Issue is created, such as reviewing the request details and scheduling Service Appointments.
ADDITIONAL INFORMATION
- Subscription Level: ConstructionOnline's Warranty Tracking feature is available for companies with current ConstructionOnline subscriptions at Team, Business, and Enterprise levels.
- Warranty Tracking is also available as a Per-Company Add-On for all other plans.
- Permissions: Admin Users and Company Users with "Can Create & Edit" and "Can Create, Edit, & Delete" permissions can create a Warranty Issue.
- Company Users must be added to the Project Team and the Project status has to be "Live."
- ClientLink Users with appropriate permissions have the ability to submit new Warranty Issues via the ClientLink portal.
- CO™ Mobile App: Users with the appropriate permissions can create new Warranty Issues via the ConstructionOnline Mobile App.
HAVE MORE QUESTIONS?
- Frequently asked questions (FAQ) about Warranty Tracking can be found in the article FAQ: Warranty Tracking.
- If you need additional assistance, chat with a ConstructionOnline Specialist by clicking the orange Chat icon located in the bottom left corner or visit the UDA Support Page for more options.