BACKGROUND
In the fast-paced world of construction, efficiency and attention to detail are key. Streamlined construction warranty management not only saves time but also improves the client experience. ConstructionOnline’s Warranty Tracking tools allow for Company Users to create and use custom Warranty Templates, saving valuable time and reducing costly errors. Using templates ensures consistency across projects and demonstrates a high standard of professionalism, while still allowing for quick adaptations when necessary to meet project-specific needs.
HOW TO CREATE A NEW WARRANTY FROM A TEMPLATE
- Navigate to the Warranty Tracking feature from within the desired Project.
- If you have chosen to have Warranty Tracking appear as a Project Quick Link, you may also access the Warranty Tracking feature from the Project's "Overview" tab.
- If you have not yet completed the Project’s initial Warranty Tracking setup sequence, you will be prompted to do so by clicking on the green “Create a New Warranty” button. Within these steps, you will have the option to "Create a Warranty from a Template."
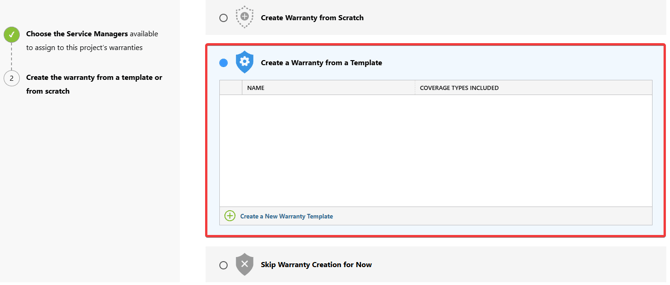
- If you have saved templates in your ConstructionOnline account, they will appear within the box. Otherwise, you can choose to create a new Warranty Template.
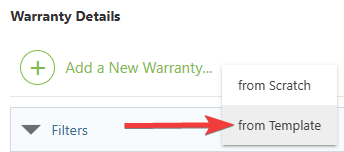
- Within the "Warranties" tab, click the green (+) Add a New Warranty button and select the "from Template" option from the dropdown menu.
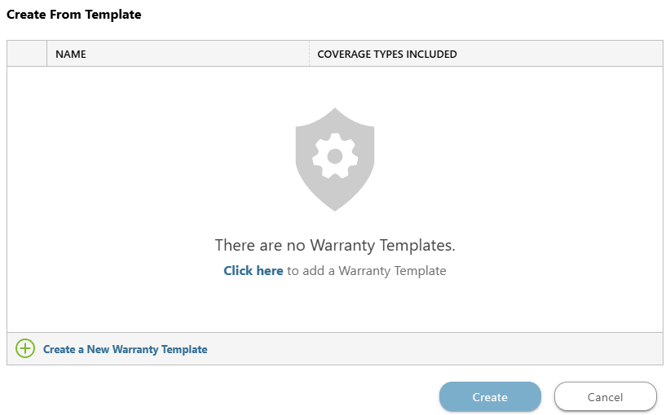
- From your list of saved Warranty Templates, choose which one you would like to use to create the new Warranty.

- If a Warranty Template has not yet been created and saved in your company's ConstructionOnline account, you will be prompted to add one.
- If a Warranty Template has not yet been created and saved in your company's ConstructionOnline account, you will be prompted to add one.
- Hit the blue "Create" button to open the "Create New Warranty from Template" extension blade on the right side of your screen. This is where you can review and confirm the details of the selected Warranty Template that automatically populates. You can also modify or enter any other Warranty Details and/or Additional Information that applies to the new Warranty.
- The following Warranty fields cannot be saved to a Warranty Template but can be added to the new Warranty at this point:
- Number: Assign the Warranty a number for organizational purposes.
- Make this warranty active?: Utilize the toggle to set the Warranty's status.
- By default, Warranties are created with an "Active" status.
- The "Active" setting implies that the Warranty is in effect, allowing it to be seen in ConstructionOnline by ClientLink Users with the appropriate permission settings.
- Setting a Warranty's status to "Draft" signifies that it is not yet in effect and, therefore, cannot be seen by ClientLink Users, regardless of their Warranty Tracking permissions.
- By default, Warranties are created with an "Active" status.
- Start Date: Specify the date on which the Warranty's coverage will begin.
- Expenses to Date: Document the dollar amount of already existing expenses associated with the Warranty.
- The following Warranty fields cannot be saved to a Warranty Template but can be added to the new Warranty at this point:
- Along with these details, set Warranty Reminders under the “Reminders” tab and upload supporting files, photos, or videos via the green (+) Add New Attachment button in the “Attachments” tab.
- Any attachments uploaded to a template will automatically be included.
- Select the blue "Save" button to create the new Warranty.
ALTERNATIVE ACCESS POINT
- From the Company Overview, navigate to the Warranty Tracking feature.
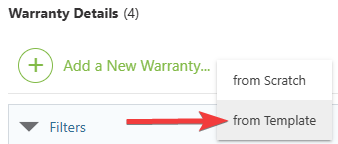
- Click the green (+) Add a New Warranty button and select the "from Template" option.
- Then, from the "Choose a Project" dropdown menu, choose the Project where the new Warranty should be saved.

- This field is required. To create a Warranty, it must be assigned to a specific Project.
- Both “Live” and “Pending” Projects will appear in the dropdown menu for Admin Users.
- Company Users with the appropriate Warranty Tracking permissions will only see the Projects that they are Team members on and that are set to “Live.”
- This field is required. To create a Warranty, it must be assigned to a specific Project.
- Once the desired Project is selected, click the blue "Next" button.
- If you have not previously created a warranty for the Project chosen, you will be prompted to complete the Project's initial Warranty Tracking setup sequence at this point.
- Follow Steps 4-6 from the section above.
ADDITIONAL INFORMATION
- Subscription Level: ConstructionOnline's Warranty Tracking feature is available for companies with current ConstructionOnline subscriptions at Team, Business, and Enterprise levels.
- Warranty Tracking is also available as a Per-Company Add-On for all other plans.
- Permissions: Admin Users and Company Users with "Can Create & Edit" and "Can Create, Edit, & Delete" permissions can create Warranties from a template.
- Company Users with their permissions set to "Can View" can see all Warranties, regardless of whether the Warranty's status is "Active" or "Draft."
- When ClientLink permissions are set to have access to the Warranty Tracking feature and a Warranty’s status is “Active,” ClientLink Users can see the Warranty Name, Coverage Type(s), and Duration within the “Warranty Dashboard.”
- CO™ Mobile App: The Warranty Tracking feature is available via the mobile app. However, creating new Warranties is currently exclusively available through browser access to ConstructionOnline.
HAVE MORE QUESTIONS?
- Frequently asked questions (FAQ) about Warranty Tracking can be found in the article FAQ: Warranty Tracking.
- If you need additional assistance, chat with a ConstructionOnline Specialist by clicking the orange Chat icon located in the bottom left corner or visit the UDA Support Page for more options.