Set Date Format
Customize how dates are displayed throughout ConstructionOnline.
OBJECTIVE
To set the date format for your ConstructionOnline Account.
BACKGROUND
Account Settings is the home of your Contact Info, Password, Date & Time Settings, Display Settings, and more. These settings can be edited at any time from the Company Dropdown Menu, found in the top right corner of ConstructionOnline. Located within Date & Time Settings, date format determines how dates are displayed throughout ConstructionOnline.
THINGS TO CONSIDER
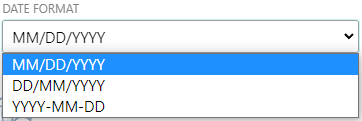
- ConstructionOnline provides three options for date format:
- MM/DD/YYYY
- DD/MM/YYYY
- YYYY-MM-DD
- By default, the ConstructionOnline Mobile App reflects the Time & Date Settings chosen in your Account Settings.
- However, date format cannot be set using the ConstructionOnline Mobile App.
- ConstructionOnline provides options customized for more than 125 countries with country-specific preferences, including date format. Setting a local country will automatically adjust your account's date format.
STEPS TO SET DATE FORMAT
- Locate the Company Dropdown Menu found in the top right corner of ConstructionOnline.
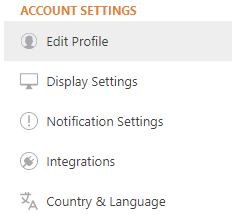
- Under Account Settings, select Edit Profile.

- This will open the Profile Settings window.
- Click the Date/Time tab under General Info.

- Using the dropdown menu, select your preferred date format.

- Click the blue Save button to finalize your changes.
HAVE MORE QUESTIONS?
We're here to help! Chat with a Specialist by clicking the orange Chat icon in the bottom left corner or Contact UDA Support for additional options.