BACKGROUND
ConstructionOnline’s Warranty Tracking tools encourage contractors to proactively address Warranty Issues through the Appointments feature. Whether the service request is initiated by the client or internally, Company Users can seamlessly create and manage Service Appointments. This centralized system is crucial for successful construction projects as it ensures all parties are aligned on coverage inquiries. By promptly addressing service requests, contractors maintain project momentum, resolve issues effectively, and build trust with their clients.
THINGS TO CONSIDER
Within ConstructionOnline, any field that shows the gear icon![]() is a Custom Value, allowing users to add, edit, or remove categories. These fields can be customized by clicking on the icon.
is a Custom Value, allowing users to add, edit, or remove categories. These fields can be customized by clicking on the icon.
HOW TO SCHEDULE A SERVICE APPOINTMENT
- Navigate to the Warranty Tracking feature from within the desired Project.
- If you have chosen to have Warranty Tracking appear as a Project Quick Link, you may also access the Warranty Tracking feature from the Project's "Overview" tab.
- If you have not yet completed the Project’s initial Warranty Tracking setup sequence, you will be prompted to do so by clicking on the green “Create a New Warranty” button.
- From within the "Appointments" tab, press the green (+) Add a New Appointment button.
- If the Appointments feature is not accessible, verify that the Warranty Tracking setup sequence has been completed for the Project in question.
- Because Service Appointments are intended to address Warranty Issues, at least one Warranty Issue must exist within the Project to create an appointment. If you have not yet created a Warranty Issue within the Project, an alert will flash at the bottom right side of your screen.

- Because Service Appointments are intended to address Warranty Issues, at least one Warranty Issue must exist within the Project to create an appointment. If you have not yet created a Warranty Issue within the Project, an alert will flash at the bottom right side of your screen.
- If the Appointments feature is not accessible, verify that the Warranty Tracking setup sequence has been completed for the Project in question.
- Choose which Warranty Issue the appointment is related to from the dropdown menu and hit the blue "Save" button.
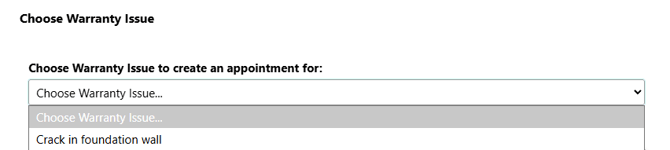
- Appointments must be related to a Warranty Issue.
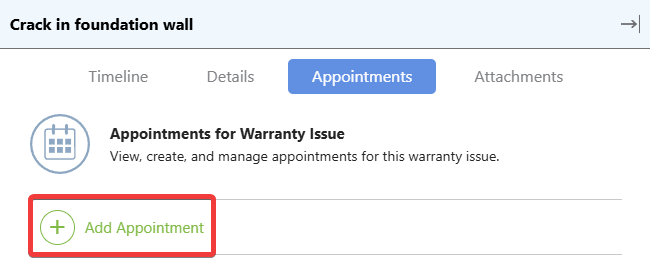
- The Warranty Issue's extension blade will open on the right side of your screen. This is where you can select the green (+) Add Appointment button.
- This will bring you to the "Create a New Appointment" extension blade, where you can enter the following information about the appointment -
- Details
- Appointment #: Assign the appointment a number for organizational purposes.
- Start Date & Time: Specify the date and time that the appointment window will begin. This field is required.
- End Date & Time: Select the date and time at which the appointment window will end. This field is required.
- Once the start date is selected, the end date will automatically populate as the same date. However, this can be changed to any day after the start date.
- The end time will populate as an hour after the start time. As long as the end time is later than the start time, it can be modified as desired.
🗒️ Note: The Start and End Date(s) & Time(s) mark the window during which the builder can arrive on-site to address service requests.
- Assigned Resource(s): Designate assigned resource(s) to the appointment.
- Work Status: Provide the work status of the Warranty Issue.
- By default, ConstructionOnline populates "None," "Not Started," "In Progress," "Verification Needed," and "Completed" as options.
- Appointment Notes / Details: Document key details and any other information pertinent to the completion of the Service Appointment. This field is required.
- Street Address: Specify the street address where the appointment will take place.
- ConstructionOnline, by default, populates the associated Project's address.
- City: Provide the city.
- State: Include the state.
- Zip: Give the zip code associated with the address.
- Country: Specify the country.
- Notifications: Choose to send appointment notifications to:
- The service provider(s) when the appointment status changes
- The notification must be toggled On to send and can be toggled Off at any time.
- The client/owner with the proposed appointment window
- By default, ConstructionOnline will populate the ClientLink User(s) associated with the Project.
- The box must be checked to send notifications and can be unchecked at any time.
- The service provider(s) when the appointment status changes
- Reminders
- Internal Recipients: Company Users in your ConstructionOnline account.
- For all appointments
- For the specific appointment being created
- External Recipients: Any Contacts within your ConstructionOnline account.
- For the specific appointment being created
- By default, ConstructionOnline populates the Client(s) associated with the Project as recipient options.
- You can add any other ConstructionOnline contacts to this list by clicking on the green (+) Add Recipient button.
- Check the box next to the contact(s) that you would like to receive these reminders.
- For the specific appointment being created
- Internal Recipients: Company Users in your ConstructionOnline account.
- Attachments: Upload any files and/or photos pertinent to the Service Appointment.
- Details
- Once you have added all of the information you wish to include, hit the blue "Save" button to generate the appointment window.
- This will send the appointment to the client portal where they will be able to approve or reject the appointment.
- If you have chosen to send the Client(s) a notification, they will immediately receive an email and/or text depending on their notification settings.
- If you choose not to send a notification to the client(s), the appointment window will be visible in the client's portal upon login.
- In your Notification Settings, you may also choose to receive an email and/or text immediately following approval or denial of an appointment window.
- You can view and change the confirmation status of the appointment under the “Appointments” tab of the Warranty Tracking feature.
- Check out “Manage Service Appointments” for more information about the next actions following client approval or rejection.
ADDITIONAL INFORMATION
- Alternative Access Point: An Appointment may also be created from within the Warranty Tracking feature from the Company Overview.
- You can also create an appointment by clicking on an issue to edit it within the "Warranty Issues" tab.
- Subscription Level: ConstructionOnline's Warranty Tracking feature is available for companies with current ConstructionOnline subscriptions at Team, Business, and Enterprise levels.
- Warranty Tracking is also available as a Per-Company Add-On for all other plans.
- Permissions: Admin Users and Company Users with "Can Create & Edit" or “Can Create, Edit, & Delete” permissions for Warranty Tracking can create an appointment.
- Company Users with these permissions can only create appointments for Warranty Issues of Projects that they are a team member on.
- CO™ Mobile App: The Warranty Tracking feature is available via the mobile app, which allows users with the appropriate permissions to view Service Appointments. However, scheduling appointments is currently exclusively available through browser access to ConstructionOnline.
HAVE MORE QUESTIONS?
- Frequently asked questions (FAQ) about Warranty Tracking can be found in the article FAQ: Warranty Tracking.
-
If you need additional assistance, chat with a ConstructionOnline Specialist by clicking the orange Chat icon located in the bottom left corner or visit the UDA Support Page for more options.