Save Attachment to a Project from Inbound Email
OBJECTIVE
To save an attachment from an Inbound Email to a ConstructionOnline Project
BACKGROUND
Concise communication throughout the job process is a vital part of any successful construction company. Inbound Emails allows you to keep all previously external communication centralized within ConstructionOnline and maintain documentation to secure the success of your job.
THINGS TO CONSIDER
- Only company employees are able to send emails into ConstructionOnline.
- Email addresses must be added to the Approved List before sending to ConstructionOnline.
- Each ConstructionOnline project has a unique Project Email Address.
- Only photo and file attachments can be saved to a Project; inline photos and attachments cannot be saved to Projects.
STEPS TO SAVE AN ATTACHMENT TO A PROJECT FROM INBOUND EMAIL
- Navigate to the desired project via the Left Sidebar
- Select the Communication tab
- Choose the Inbound Emails category
- Click on the email containing the attachment to open it
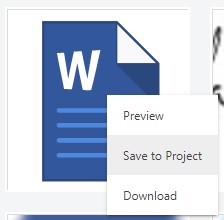
- Right-click on the attachment
- Select Save to Project

- This will open the Save to ConstructionOnline window
- Choose where to save the attachment
- Click save
HAVE MORE QUESTIONS?
- Frequently asked questions (FAQ) about Inbound Emails can be found in the article FAQ: Inbound Emails.
- If you need additional assistance, chat with a Specialist by clicking the orange Chat icon located in the bottom left corner or visit the UDA support page for additional options.