OBJECTIVE
To replace an existing Project Image in ConstructionOnline.
BACKGROUND
Projects in ConstructionOnline act as central hubs of information for jobs, housing critical data such as budgets, schedules, documents, plans, and more. Each Project in ConstructionOnline has its own unique Project Overview page with Quick Links to key features and important information displayed for easy, at-a-glance reference. Alongside the selected Project Image, the Project Overview page includes Project Address, Clients, Project Details, Jobsite Instructions, TrueVision™ Profit Tracking & Project Score, Weather, Project Map, and Latest Project Activity.
THINGS TO CONSIDER
- Once a Project Image has been replaced, all Company Users and ClientLink contacts associated with that project will be able to view the new image in their respective Project Overview page.
- All Company Users are able to replace existing Project Images in Projects they have been added to.
- The following file types are acceptable for Project Images: jpeg, gif, bmp, tiff, & png.
- Users cannot replace Project Images using the ConstructionOnline Mobile App.
STEPS TO REPLACE A PROJECT IMAGE
- Navigate to the desired Project using the Left Sidebar.
- Under the Project Overview tab, click on the current Project Image.
- Click one of the two options:
- The current Project Image
- The Change Image button
- Select the new image upload location from the options listed:
- Your Computer: if the image is stored somewhere in your computer documents, downloads, etc.
- ConstructionOnline: if the image has already been uploaded somewhere on ConstructionOnline such as Company Files, My Files, or even in the Project itself.
- Your Cloud File Storage: if the image is stored in one of the Cloud Storage platforms available to integrate with ConstructionOnline such as Google Drive, box, OneDrive, or Dropbox.
- OR drag and drop the image file directly into the window.
- If the image file is uploaded from your computer or your cloud file storage, it will be automatically saved to your Project Files and Uncategorized Photos.
- Once selected, a pop-up window for resizing the new image will appear. Use the slider bar to adjust how much of the original image you want to see in the white box representing the Project Image.
- Click Save to apply the resizing changes to the image. This will close the pop-up.
After clicking Save, any changes made to the Project Image become permanent. To make additional edits or changes, the Project Image must be uploaded again.
7. Click Save to view the new Project Image.
ALTERNATIVE ACCESS POINT
- You can also use the Edit Project Details page to replace a Project Image.
-
- Navigate to the desired Project using the Left Sidebar.
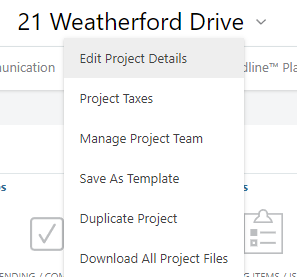
- Click on the Project Name located at the top of the page.
- Select Edit Project Details from the dropdown menu.
- Select the Project Image tab.
- Follow steps 3 - 7 as listed above.
-
HAVE MORE QUESTIONS?
- Frequently asked questions (FAQ) about Projects can be found in the article FAQ: Projects.
- If you need additional assistance, chat with a Specialist by clicking the orange Chat icon located in the bottom left corner or visit the UDA Support Page for additional options.