Getting Started with New Redline Takeoff™ & OnCost™ Estimating Integration
Redline Takeoff has been redesigned from the ground up to give you the power to create detailed estimates directly from your plan set. Simply upload your plans, choose your preferred takeoff structure, and start measuring. Costbook items can be assigned directly to your measurements, giving you up-to-date cost data and resulting in the most accurate estimates possible.
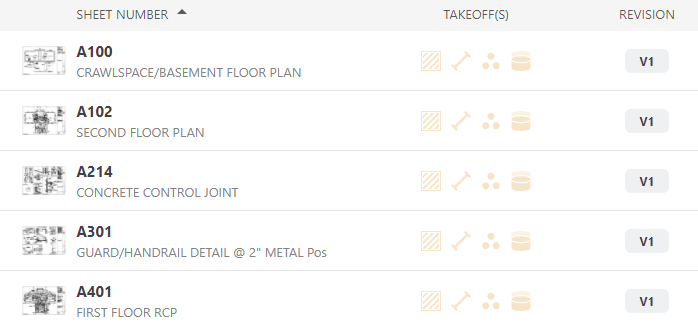
- Upload Your Plans to Redline Takeoff
- Your plan set will be automatically scanned for sheet number, name, callouts and tags. Once your sheets are published, click on a sheet to begin taking off.
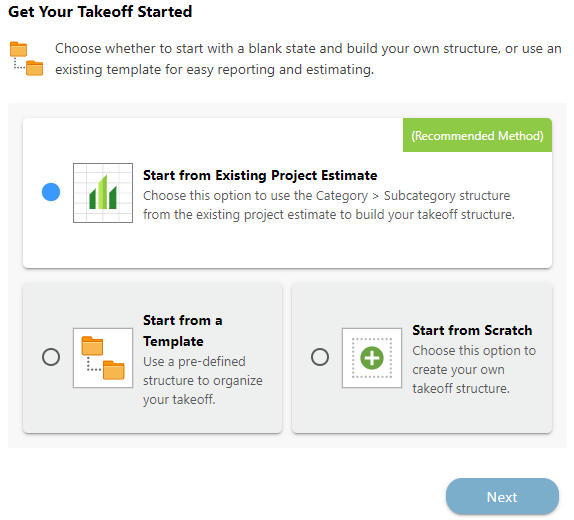
- Choose the Takeoff Structure
- If the project already has an estimate, it’s recommended to use its Category > Subcategory structure. You can also start from a takeoff template or from scratch.
- Choose the Category > Subcategory to Begin Taking Off
- The takeoff structure is shown in the right sidebar - it will always be in the Category > Subcategory format in order to match the project estimate structure. Takeoffs can only be created in the Subcategory level.

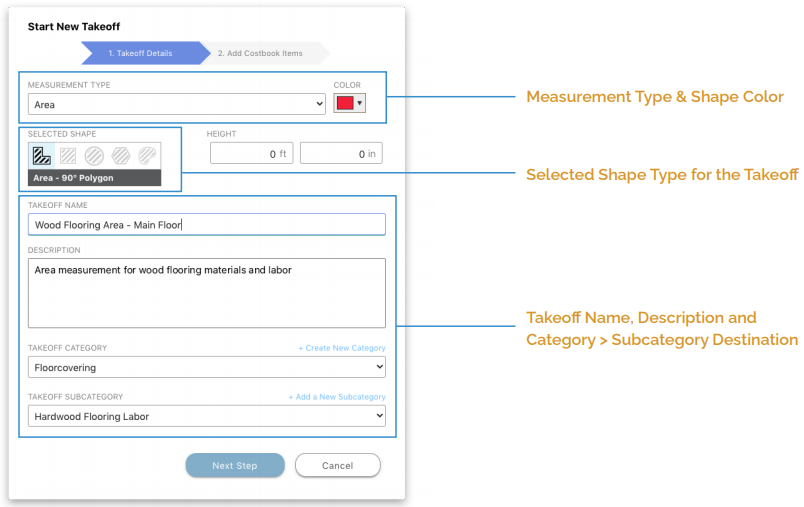
- Choose the Measurement Type, Shape Tool, Color and More
- Redline Takeoff offers a variety of measurement tools to handle different types of takeoffs. For example if you are doing a flooring takeoff, you would choose the Area Type and a shape tool (90° Polygon, Rectangle, Ellipse, Polygon or Freehand).
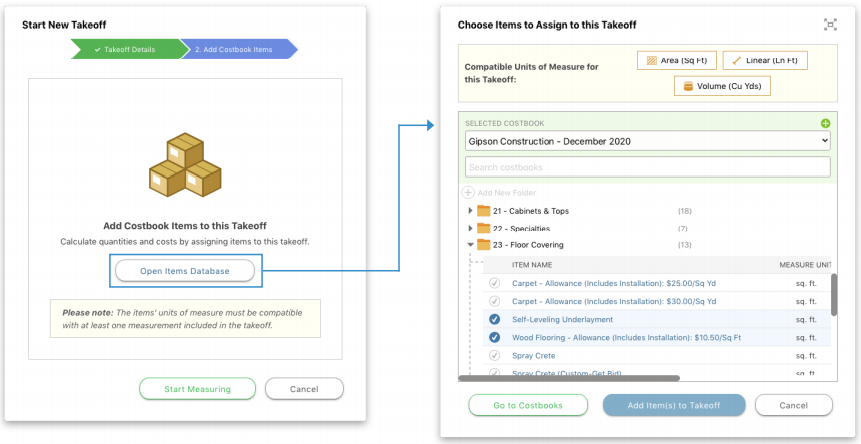
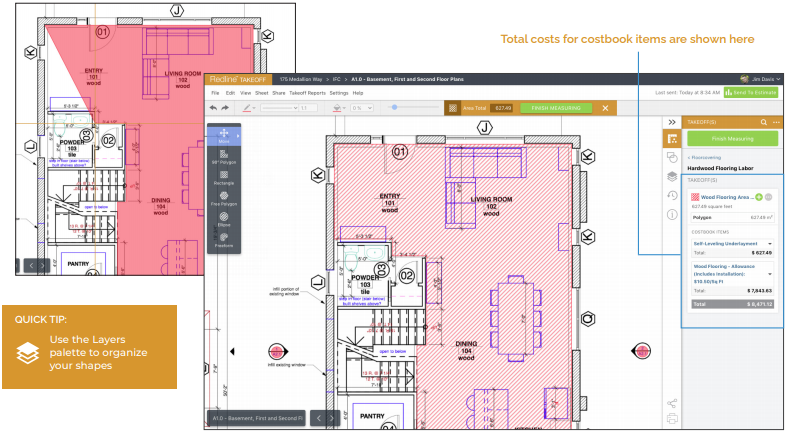
- Assign Costbook Items to the Takeoff
- Quickly determine quantities and costs needed for your takeoffs by assigning Costbook Items. Please note the Unit of Measure for the assigned items must match the takeoff type you are performing - for example, you could assign a wood flooring material item to an area takeoff, since the item’s UOM is square feet.
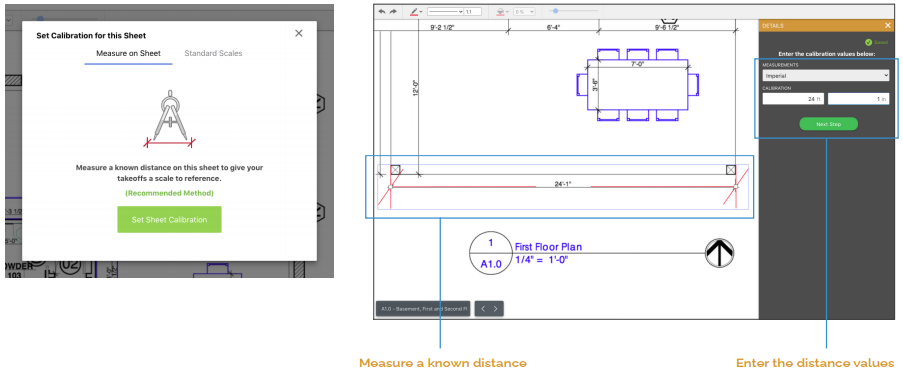
- Set the Calibration for the Sheet
- Before starting your first measurement, you must set the calibration for the sheet. It’s recommended to measure a known distance on your sheet for the most accurate results. You can also choose a standard scale if the manual measurement method is not possible.
- Start Measuring
- Create a measurement shape for your takeoff. To add additional shapes, click the green plus icon in the right sidebar and choose “Add Measurements.” When you are done measuring, click the “Finish Measuring” button.
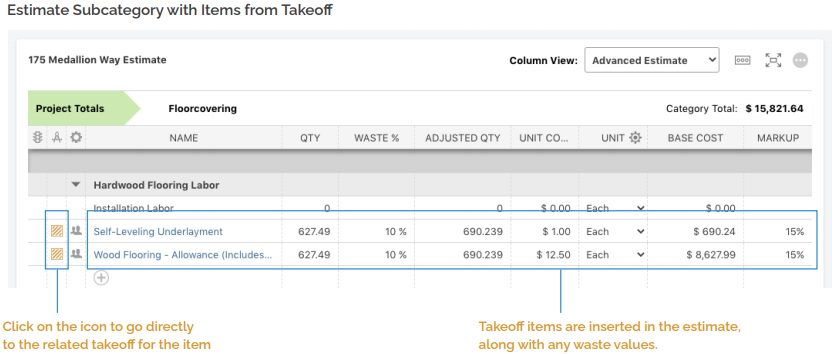
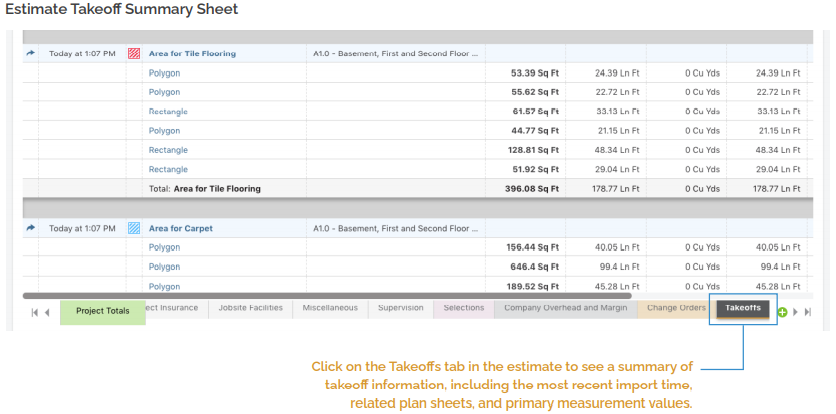
- Sending Takeoff Data to the Estimate
- When you are ready to send your takeoff data to the project estimate, simply click the “Send to Estimate” button in the toolbar. You can choose to aggregate any identical costbook items, or show them as separate line items within their respective estimate subcategories.

Download the PDF: Getting Started with Redline Takeoff
HAVE MORE QUESTIONS?
- Frequently asked questions (FAQs) about Redline Takeoff can be found in the article FAQ: Redline Takeoff.
- If you need additional assistance, chat with a Specialist by clicking the orange Chat icon located in the bottom left corner or visit the UDA support page for additional options.