OBJECTIVE
To import Company Costbooks to ConstructionOnline.
BACKGROUND
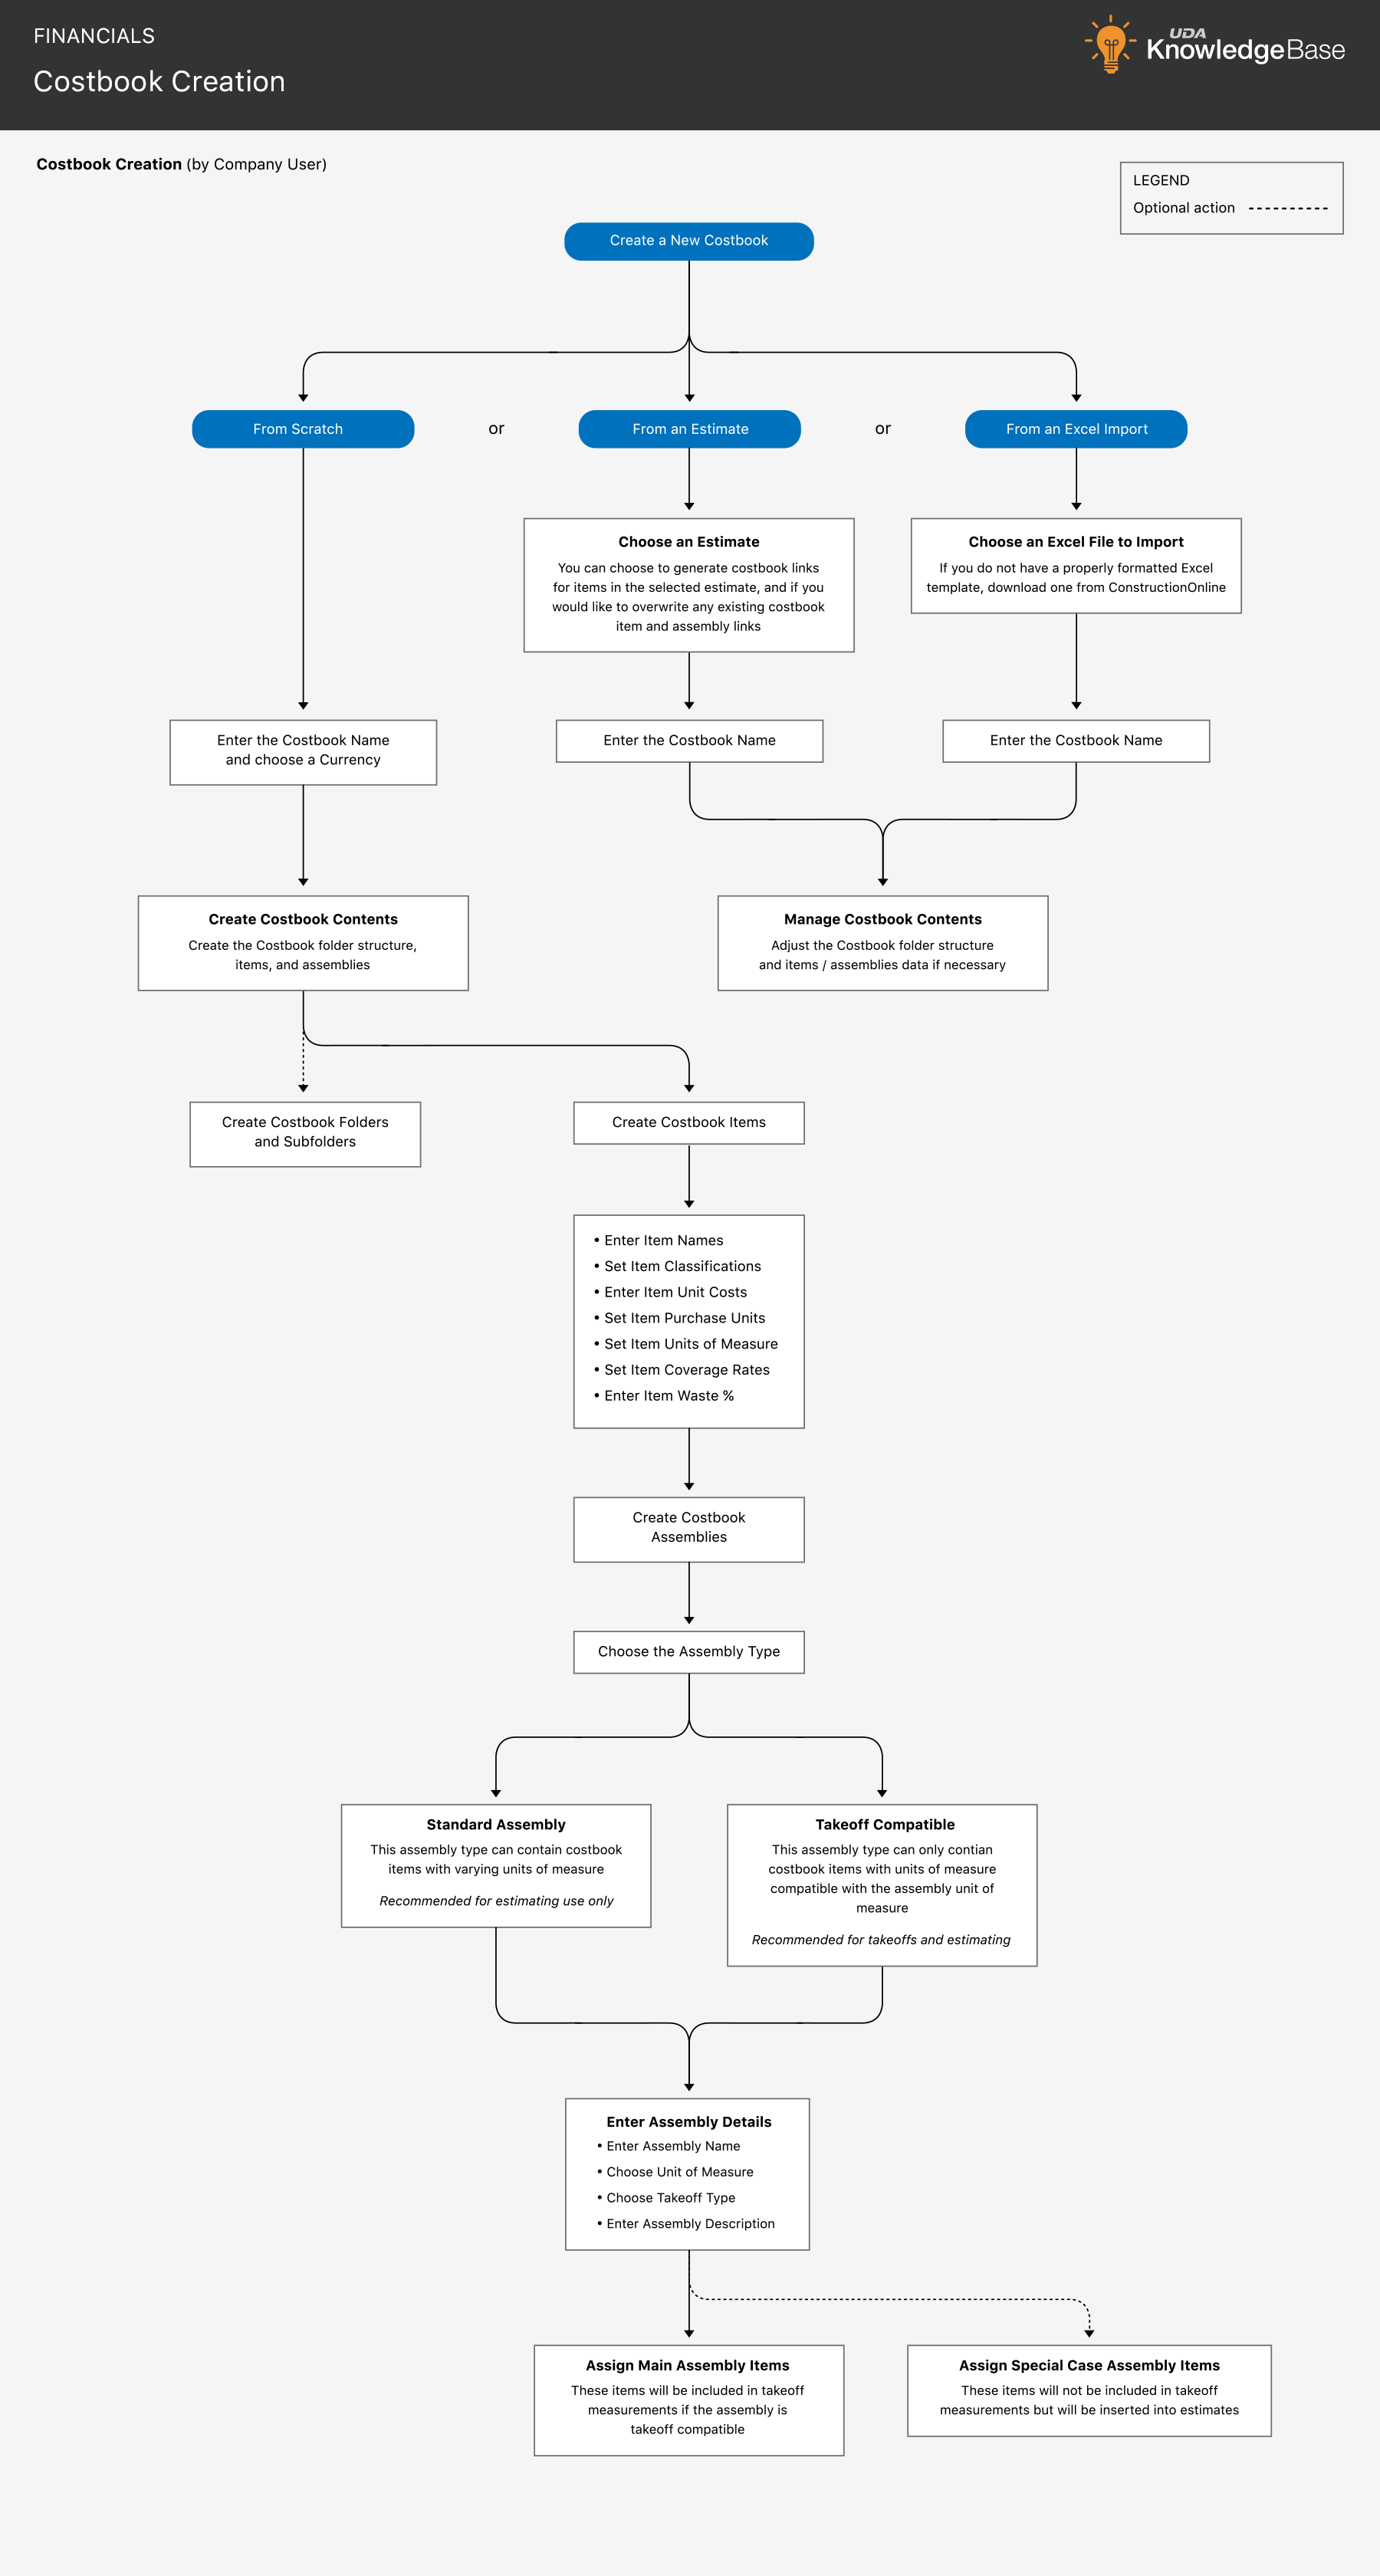
ConstructionOnline's Items Database delivers a powerful, yet easy-to-use system for storing, tracking, and managing construction costs. By centralizing construction cost information in a single database, companies can streamline estimate creation, improve estimate accuracy, and apply estimate updates. With multi-level organization, ConstructionOnline's fully customizable Costbooks are flexible enough to support every company's cost structure.
THINGS TO CONSIDER
- Files must be saved in .CSV format for successful import into ConstructionOnline Company Costbooks.
- Company Users must have permissions to add, edit, and delete Company Costbooks.
-
STEPS TO IMPORT COMPANY COSTBOOKS
- Navigate to the Company Dropdown Menu at the top right corner of the page
- Select Company Costbooks
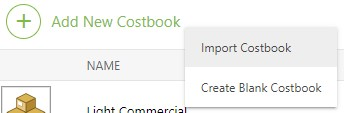
- Click the green +Add New Costbook button
- Choose Create Blank Costbook
- Select Import Costbook
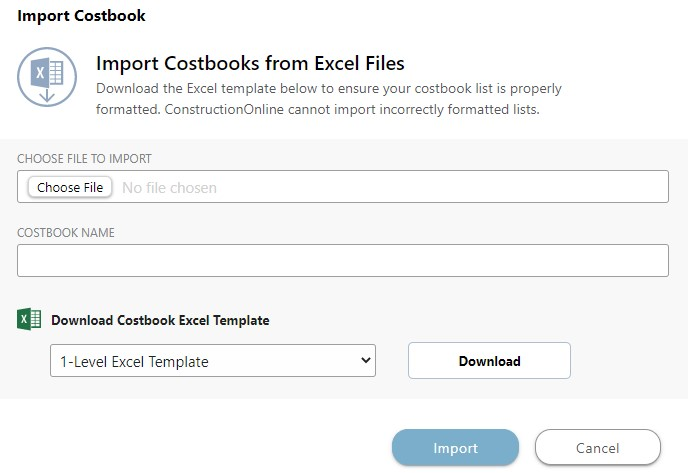
- This will open the Import Costbook window
- Download the Costbook Excel Template that fits your desired level of detail
- Enter your Costbook information in the Excel file following the format
- Save the Excel file and navigate back to ConstructionOnline
- Choose the Excel File to import and name the Costbook
- Click Import
HAVE MORE QUESTIONS?
- Frequently asked questions (FAQ) about Costbooks can be found in the article FAQ: Items Database & Costbooks.
- If you need additional assistance, chat with a Specialist by clicking the orange Chat icon located in the bottom left corner or visit the UDA Support Page for additional options.