
ConstructionOnline's Inbound Emails tool gives every project its own dedicated email address, so approved senders can route external correspondence straight into the project. Emails—and their attachments—are stored together, visible to the team, and easy to filter and find later. This guide to Getting Started with Inbound Emails walks through how inbound emails work and how to set the tool up: choosing approved senders, sharing the project's email address, and setting the right permissions.

Receive External Emails for Your Projects
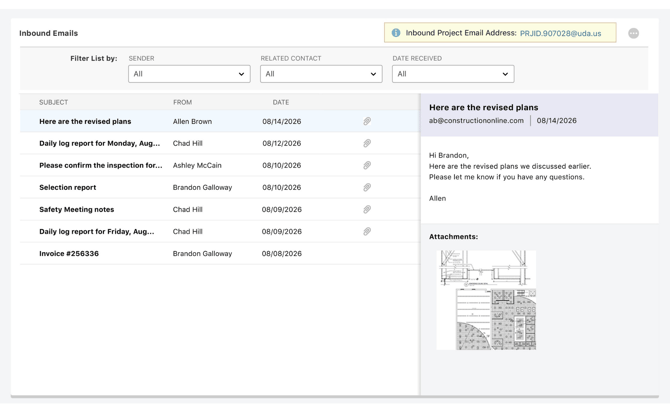
Every project in ConstructionOnline has its own dedicated inbound email address. Approved senders email that address directly, and their messages land on the project's Inbound Emails page, keeping relevant correspondence with the project, instead of scattered across separate personal inboxes.
- A Dedicated Email Address for Each Project: Every project created in ConstructionOnline has its own unique inbound email address, displayed at the top of the Inbound Emails page.
- Full Details & Attachments: Open any message to read it in full and view or download attached documents and photos.
- Stored & Searchable: Emails are saved to the project record for future reference and can be filtered by sender, related contact, or date received.
Setting Up the Inbound Emails Tool
Get Inbound Emails up and running in three quick easy steps:
1. Choose Approved Senders: Designate who is allowed to email into the project and which specific email addresses will be accepted, so only approved correspondence is added.
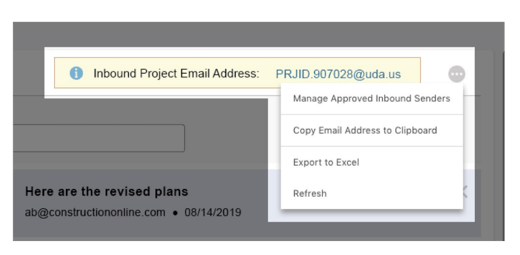
This protects the integrity of the project record and prevents the system from logging any spam or junk messages. 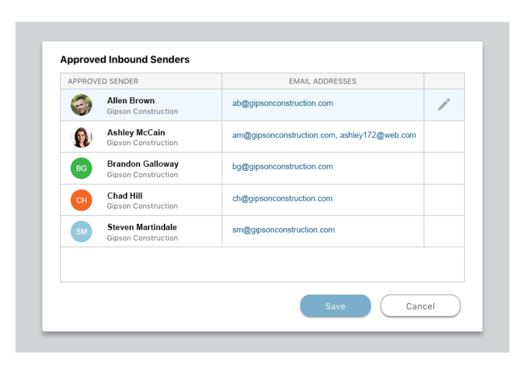 2. Share Project Email Address: Copy the project's dedicated inbound email address from the Inbound Emails page within the project, and share it with your approved senders.
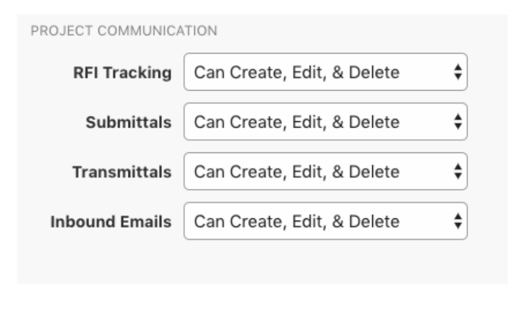
  3. Set Employee Permissions: Control which of your Company Users can access the Inbound Emails page by setting the Inbound Emails permission level under Project Communication in each employee's Company Employee Settings.
 Suggested Next Steps
- Add Approved Senders
- Copy Project Inbound Email Address
- Share the Inbound Email Address with the Approved Senders and consolidate correspondence in ConstructionOnline.
HAVE MORE QUESTIONS?
- Frequently asked questions (FAQ) regarding Inbound Emails can be found in the FAQ: Inbound Emails article.
- If you need additional assistance, chat with a ConstructionOnline Specialist by clicking the orange Chat icon in the bottom left corner or visit the UDA Support Page for more options.