Create Invoices from Approved Change Orders
OBJECTIVE
To create an Invoice from an Approved Change Order in ConstructionOnline.
BACKGROUND
ConstructionOnline provides the most powerful cloud-based Estimating in the industry, giving users the ability to manage their Project Financials from Proposal generation through final Invoicing.
THINGS TO CONSIDER
- Company Users assigned to the Project must have permission to be able to create, edit, or delete an Invoice.
STEPS TO CREATE AN INVOICE FROM AN APPROVED CHANGE ORDER
- Navigate to the desired Project via the Left Sidebar
- Select the Financials tab
- Choose the Invoicing category
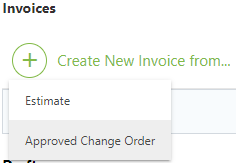
- Click the green +Create New Invoice from button
- Select Approved Change Order from the dropdown menu

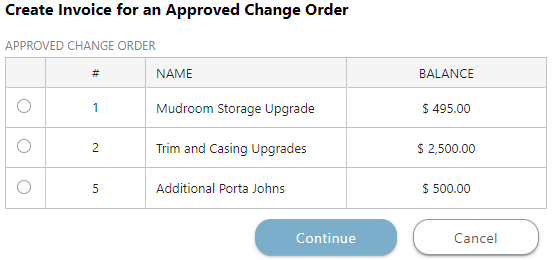
- This will open the Create Invoice for an Approved Change Order window
- Choose the Change Order to create an Invoice for
- Click Continue

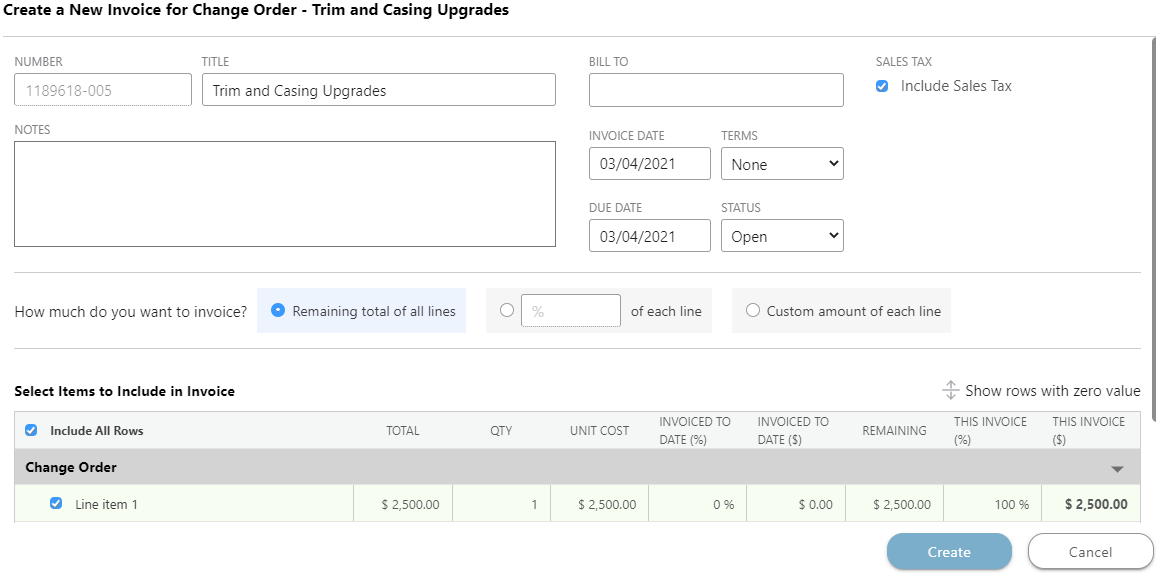
- This will open the Create a New Invoice window
- Enter the Invoice information:
- The Invoice Number cannot be edited, but you use the Title field for what you need such as an internal numbering system, a title for the Invoice, etc.
- Select the Client from the dropdown menu in the Bill To field
- Choose if you'd like to include Sales Tax, the Terms, Due Date, Status, and how much you want to Invoice
- Click Create

HAVE MORE QUESTIONS?
- Frequently asked questions (FAQ) about Invoicing can be found in the article FAQ: Invoicing.
- If you need additional assistance, chat with a Specialist by clicking the orange Chat icon located in the bottom left corner or visit the UDA support page for additional options.