Client Selections in the Portal
OBJECTIVE
To access Client Selections in the ClientLink/TeamLink Portal
BACKGROUND
The ClientLink/TeamLink Portal was designed specifically for Clients and other Team members, such as Subcontractors and Architects, to stay connected and up to date on important information throughout the duration of the Project.
STEPS TO ACCESS CLIENT SELECTIONS
A. For ClientLink Users to view and approve Selections:
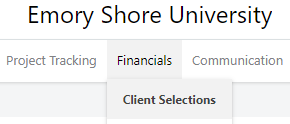
- In the desired Project, hover over the Financials tab
- Select Client Selections

- Scroll to view the Selections
- To approve a pending Selection, scroll to the Selections Details pane
- Locate the desired Selection Choice and click the green Approve button

B. For TeamLink Users to view Selections:
- In the desired Project, hover over the Financials tab
- Select Client Selections

- Scroll to view the Selections
C. To Print Approved Selections:
- In the desired Project, hover over the Financials tab
- Select Client Selections
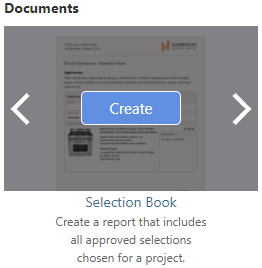
- Locate Documents at the top right of the Selections
- Hover over the Selection Book report
- Click Create

- The report will open in a new tab
- You can Share, Save, Download, or Print the Report at the top right of the page

HAVE MORE QUESTIONS?
- Frequently asked questions (FAQ) for ClientLink Users can be found in the article FAQ: ClientLink.
- Frequently asked questions (FAQ) for TeamLink Users can be found in the article FAQ: TeamLink.
- If you need additional assistance, chat with a Specialist by clicking the orange Chat icon located in the bottom left corner or visit the UDA support page for more options.