Add your Service Area to your Public Profile
Share the geographical areas where your Company is active.
OBJECTIVE
To add your service area to your Company Public Profile.
BACKGROUND
ConstructionOnline provides every company with a Company Public Profile: a unique, single-page webpage that acts as both a customizable landing page and a login page for ClientLink™ and TeamLink™ Contacts. Company Admin Users are responsible for customizing and maintaining the Company Public Profile, which can be used to grow business, capture new leads, and promote the company online. During customization, Company Admin Users can choose to display your company's service area on the Company Public Profile.
THINGS TO CONSIDER
- Service area represents the geographical area(s) where your company is active.
- Service area on the Company Public Profile can be presented in either paragraph or bulleted list form.
- The Company Public Profile cannot be customized using the ConstructionOnline Mobile App.
STEPS TO ADD YOUR SERVICE AREA TO YOUR PUBLIC PROFILE
- Locate the Company Dropdown Menu found in the top right corner of ConstructionOnline.
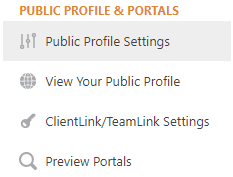
- Under Public Profile & Portals, select Public Profile Settings.

- Choose the Company Info tab.
- Select Credentials.
- Under Service Area, select the desired format to display your company's service area.

- Show as a paragraph
- Using the text field, enter the service area in paragraph form.
- Show as bulleted list
- Enter a service area location in each individual text field.
- To add more text fields, click the Add Item button.
- Show as a paragraph
- Click the blue Save button to save your company's service area.
- Remember: You can click the Preview button to view your changes before saving. Try using it during Step 5 to view how your company's service area will appear on your Company Public Profile.
HAVE MORE QUESTIONS?
We're here to help! Chat with a Specialist by clicking the orange Chat icon in the bottom left corner or Contact UDA Support for additional options.