Add Files to CO Drive
OBJECTIVE
To add Files through CO Drive to ConstructionOnline.
BACKGROUND
ConstructionOnline Drive is a desktop application for Windows that integrates with ConstructionOnline to make uploading and editing your documents, schedules, emails and more easier than ever. With CO Drive, you'll save time and effort by combining the power of your desktop with the flexibility of the cloud.
THINGS TO CONSIDER
- CO Drive must be downloaded onto your computer.
- You will need a Pro ConstructionOnline account subscription to use CO Drive.
- Uploading Files, Schedules, and Emails through CO Drive will directly upload into ConstructionOnline.
STEPS TO ADD FILES TO CO DRIVE
- Open CO Drive
- Select the desired location for the upload via the Left Sidebar
- Choose the Files tab located at the top of CO Drive

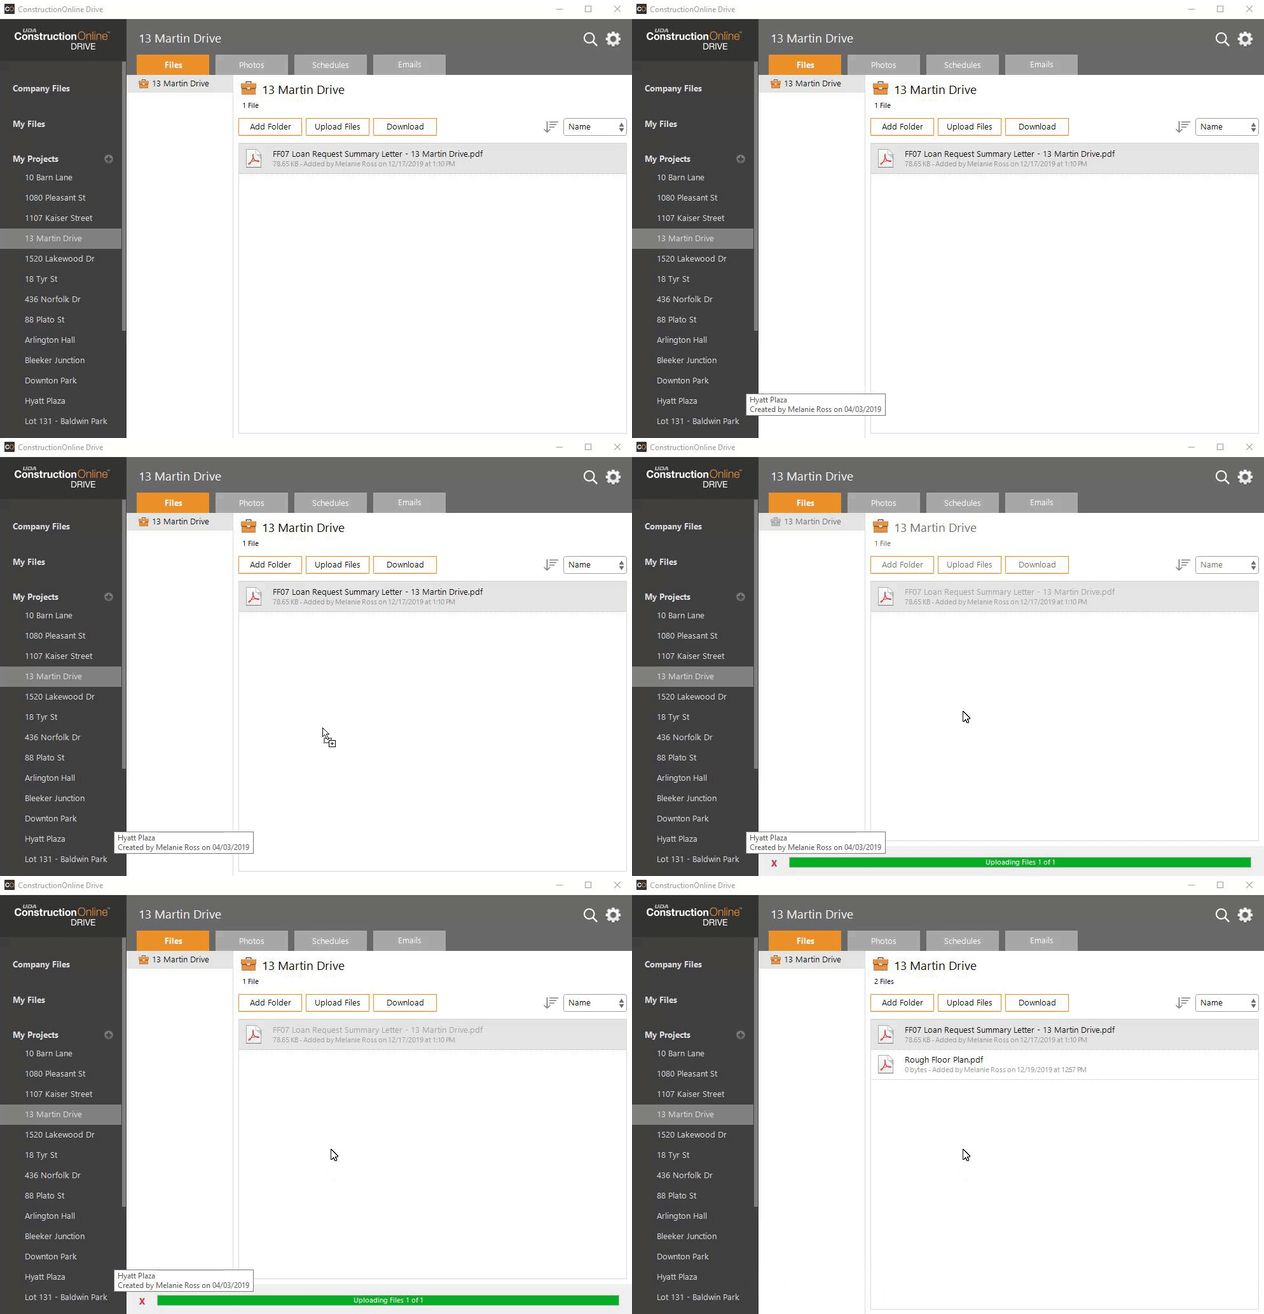
- Drag and drop the desired files from your computer to the indicated space within CO Drive
- If Files are already within the selected location, drop the Files within the square where File names are listed
- Files will automatically begin to upload with a status bar at the bottom of the window

- Once completed, File names and details will appear within CO Drive
HAVE MORE QUESTIONS?
We're here to help! Chat with a Specialist by clicking the orange Chat icon in the bottom left corner or Contact UDA Support for additional options.